[Updated on 1 June 2020] It’s a game of many names including Spanish Horseshoes, Beersbee, Frisbineer, and Pole-ish Horseshoes, but no matter what you call it, it is one of the most fun backyard games out there right now. If you have never heard of Polish Horseshoes this buyer’s guide will tell you everything you need to know about the growing outdoor pastime; if this is not your first experience with the game, it will still serve as a reference to make the most out of the game. By the time you finish with this buyer’s guide, you will have all the trenbolon erfahrungsbericht resources you need to buy the best equipment possible and play the game to the fullest.
What Is It?
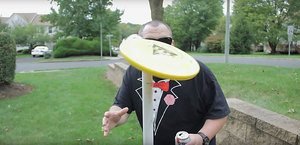
Despite what the name may suggest, this game has nothing to do with the country of Poland. Instead, it gets its name from the two poles that make up a large percentage of the equipment you need to play the game. To be specific, you will need two poles, two Frisbees, and two bottles to play the game. You can DIY this game, but if you are looking to be able to pull it out and play whenever you feel like it, it is better to buy a kit.
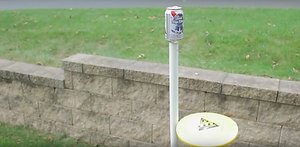 One bottle balances on the top of each pole and the poles are placed between twenty and forty feet apart from each other. Each team stands on either side of their pole and throws a Frisbee at the other team’s bottle trying to knock it off the pole. Knocking the bottle off the ground and making it hit the ground is the goal, but it is not the only way to score in this game.
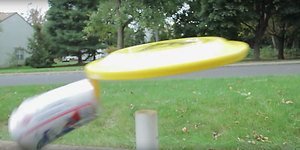 If the throwing team scores a direct hit on the bottle and it falls off and hits the ground, it is worth 2 points. If the Frisbee hits the pole and the bottle falls off and hits the ground, it is still worth 1 point. If the opposing team catches the bottle before it hits the ground in either instance 1 point is deducted. In addition to the bottle being caught, the disc needs to be caught after every throw; if the disc is not caught, it is worth one point. The exception to this rule is that the disc must be within a step and arm’s length of the opposing team; otherwise, it is considered unplayable.
The disc can’t be caught in front of the pole if it is the throwing team automatically gets 3 points, which is the maximum points you can earn in a single throw. Each game is played to 21 points, but the winning score must be by 2 points so if the score is 21 – 20 the team with 21 would need at least one more point to win.
Where to Play
Polish Horseshoes is still a relatively new game, so you will probably be hard-pressed to find a lot of “courts” already set up. One of the great things about this game is how portable it is and how you can play on almost any surface. As long as you have a wide-open, flat surface, you have all the environment you need for a great game of Polish Horseshoes.
Although it is not a necessary part of the game, Polish Horseshoes is heavily tied with drinking alcohol. If you are looking to find a place where there are leagues or other amateurs looking for a match, a local bar is a good place to start. You could always grab a bucket of beers, set up on the beach, and try to recruit random beachgoers.
Who Can Play?
This is a bit of a loaded question because in its purest form Polish horseshoes is meant to be a 21+ game. Some versions of the rules even state that if you spill your drink (usually referred to as beer in most cases) while catching the bottle or disc, the throwing team still gets the points. However, there is nothing to say that families can’t skip those rules altogether.
One of the many things that make this game great is that it doesn’t take a lot of skill, and there is not much moving involved. People of most ages, abilities, and mobility can play this game without needing to change anything about it. It’s just one more reason why this game is quickly becoming a popular backyard game.
Materials
There are no specific materials required for the equipment of this game, but the most common materials have their pros and cons.
 Poles
Poles
1. Wood
Poles made from wood are nice because they are easy to find and fairly durable. If you go over the top, you can treat these poles to be water-resistant so they will last longer outdoors. The downside with wood poles is that the wood can warp and bend, making it unable to hold the bottle straight and wood poles must stay in a single 5-foot piece. Wood is also solid, so the transfer of energy from the disc to the pole is not as much as the hollow options. One more issue is that a softer wood will get dented and look pretty rough over time.
2. PVC
A lot of the DIY instructions call for PVC because it is inexpensive, durable, and weather-resistant. It is also easy to cut for the perfect length, and the hardware store will have everything you need to make the pole in one aisle. PVC is hollow, which is better for the energy transfer from the disc to the pole, but it also causes more bounce, which is good for the thrower but bad for the receiver. Though PVC is durable, it is not immune from nicks and scuffs from use over time.
3. Aluminum
Most premade kits that you can buy online use aluminum for the poles, which is the best material possible for this game. It offers great energy transfer and is weather-resistant, but most importantly, it is durable and won’t have the same problems that the others have from continuous use. Discs bounce perfectly off of the metal, and the sound it makes is not only satisfying, but there is no question as to whether your shot connected or not.
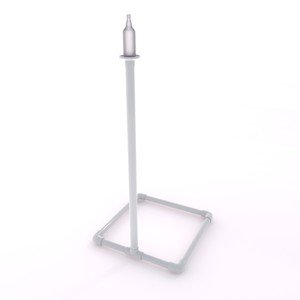 Bottles
1. Aluminum
Like the poles, aluminum is the best choice for the bottles. Most premade kits have aluminum bottles because they are safer and more durable than other options. They are usually heavier than other options as well, which makes them better for playing on windy days and preventing lucky shots.
2. Plastic
Plastic bottles come with cheaper premade kits and can often be found with DIY kits depending on where you are and the materials you have available. Plastic bottles are durable and handle repeatedly hitting the ground, but they are light and will blow off your poles on a windy day.
3. Glass
Glass bottles are the most abundant type of bottle for a DIY kit, and they have a great weight, but they have one big flaw. Glass bottles are glass, and if they hit anything hard, even once, they can crack or break pausing gameplay and making for unsafe playing conditions.
Discs
Discs are universally made of the same or close to the same material. If you are playing with a disc that isn’t hard plastic, it is a good bet that it won’t work for Polish Horseshoes. There are not any official rules for discs yet, so you can choose whatever type of disc you want for the game and in any size you want. For a more consistent game, it is suggested that you use a standard Frisbee disc.
DIY Vs. Store-Bought – Pros and Cons of both
The origin of Polish Horseshoes is still widely unknown, but it was born in the backyard using whatever the creators had around. That spirit is still very much alive today with pages upon pages of search results about how to make your own Polish Horseshoes set. There is something to be said for making your own kit, but a lot of people will also want the simplicity of buying a premade kit. There are advantages and disadvantages to both.
DIY
Pros
- These kits can easily be made out of items that a lot of people have around the house, if not the materials are available at your local hardware store.
- Even if you have to go out and buy materials to make this game, they are relatively inexpensive.
- You will have one of the most fun outdoor games within an hour of deciding you want it.
Cons
- It is relatively easy to put together, but if you lack attention to detail, your kit can come out with imperfections.
- Using sub-quality materials will make the game unsafe to play.
- A homemade kit will probably not last as long, especially if not treated for environmental impact.
Premade Kit
Pros
- The number one advantage of a premade kit is its convenience. You don’t need to work about cutting anything or gathering materials because it is already there for you.
- These kits are made with quality and durable materials that will last much longer than homemade products.
- These kits are more aesthetically pleasing, which is not a big deal but it is still nice for your stuff to look nice.
Cons
- Convenience and quality materials mean that you will spend more money.
- You have to go to the store or order them online.
- It’s not as easy to replace lost or broken parts.
How to Make Your Own Kit
If you want to make your own Polish Horseshoes kit you want to do it right. Here is a detailed list of materials needed and instructions on how to make your own backyard fun.
Materials Needed
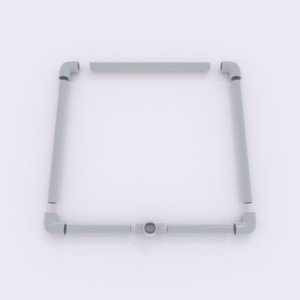
4 – 2 inch wide, 2 ½ foot PVC Pipes. Cut them yourself or ask the hardware store and they might do it for you.
2 – 2 inch PVC Coupling
2 – 2 inch to 2 inch PVC Thread Fitting
2 – 2 inch Pipe Thread Metal Flanges
2 – 2 ½ inch to 2 inch PVC Reducer
2 – 2-inch x 10-inch x 24-inch heavy wood boards.
8 – 1 ½ inch flathead screws
1 Can PVC Primer
1 Can PVC Cement
Discs and Bottles of your choosing
 How to Make Your Poles
- Repeat the following steps twice to create two poles.
- Primer smells terrible, so it is best to do this outside.
- Prime both ends of one pipe and one end of the other pipe.
- Prime the 2 inch half of the reducer, one side of the coupling, and one half of the coupling.
- Apply cement to the inside and outside of each end of the pipe with both ends primed.
- Cement the thread adapter on one end and the coupling on the other end.
- Apply cement to the primed end of the other pole inside and out and cement the reducer on that end.
- Take your baseboard and draw an X in the center of the board.
- Center your metal flange so that the X is in the middle of the circle.
- Use a power drill and your screws to screw the flange tight to the board.
- Screw the threaded side of the double-sided pole into the flange.
- Add the send pole and place a bottle on top.
- You are now ready to play one of the most entertaining outdoor games ever invented.
How to Maintain Your Equipment
The nice thing about this game is that there are not a lot of parts, and most of them take little to no upkeep to keep them in good condition. There are a few things you can do to make sure that this game, manufactured or DIY stays in its best condition.
- If it is played on or near water or left out in the rain, wipe it down as soon as possible.
- If played on or near saltwater, rinse with fresh water then wipe it down.
- If you are using a premade kit like Yardies, lubricate the threads occasionally.
- Store your Polish Horseshoes in a dry place out of the sun.
How to Transport Your Equipment
The great thing about this game is that it just as fun on the beach as it is in the backyard, but that requires transportation. If you buy a set, it will come in a bag, but if you make your own you will need to furnish your own transportation method. For DIY wood kits, your poles are most likely a single solid piece which makes transportation a bit more difficult. At the standard 5 feet, it is hard to find a bag that will fit the poles, but if you can a water-resistant bag is the best-case scenario. Even if your poles are separate, you can pack the rest of your supplies in a smaller duffel bag to keep them together. A tarp and some bungee cords are suitable to protect your poles while traveling. A DIY PVC kit is a little easier since those parts should easily fit in a large water-resistant duffel bag.
Anything Else?
This is an exciting time for Polish Horseshoes because the popularity of the game is still building. We will likely continue to see this game grow over the next few years, and courts and tournaments will start popping up at bars and beaches across the country. If you already love this game or this is the first time you are hearing about it, make sure to check back regularly as the rules and regulations will undoubtedly change as the game evolves.



Comments are closed.